
Part of the fun, at least in my opinion, of getting Windows 9x running on computers that were designed for Windows XP and later is the driver search. Recently, while looking for a driver for the Broadcom BCM4401 B0 Ethernet Controller compatible with Windows 95, I found myself unable to locate one that worked. Version 4.28 of the official driver was only compatible with Windows 98 and later, and a hacked version of 4.37 supposedly compatible with Windows 95 did not work, at least not with my particular NIC.
Onboard network support for a Dell Latitude D520 laptop running Windows 95 was starting to look hopeless, but I did notice that there existed a DOS driver that was supposedly compatible with this device. The obvious question was, “Can the DOS driver be used in Windows 95?” Turns out, yes, it can! Although a BCM440x NIC was used in this case, this same process should apply towards any NIC with a compatible DOS driver available.
Note that this should only be done as a last resort if a working driver made for your version of Windows 95/98 cannot be located. You will notice boot time increases and potentially reduced performance if you have to use a DOS driver. With that out of the way, let’s continue.
Files Used for the Example (Dell Latitude D520, Broadcom BCM4401 B0 NIC)
- Broadcom BCM440x DOS/NDIS2 Ethernet Controller v2.44
- OEMSETUP.INF and DUMMYNIC.INF referenced in the steps are both included.
- DUMMYNIC.INF – Optional, general-purpose, can be used with any Ethernet controller
Steps
- Locate a DOS/NDIS2 driver for your NIC.
- For the BCM440x line of devices, I was able to locate version 2.44 of B44.dos for this purpose. I renamed this file to B44.do_ to aid with the installation process; doing so may/may not help in your particular situation.
- If the driver does not contain an INF file (likely called OEMSETUP.INF), then you will need to either find or create one.
- I found myself in this category, but I was able to locate an old post (archived link) on the Dell forums from a thoughtful soul who pieced together an INF that ended up working for me.
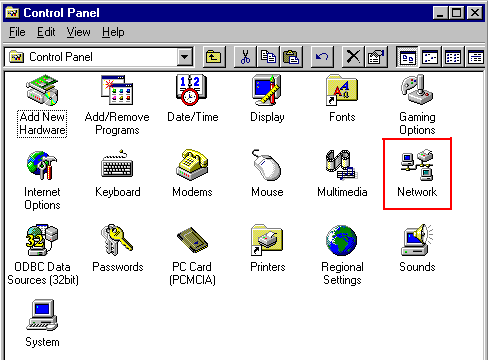
- To install the driver, open the Network control panel. Note that the driver installation is not done through Device Manager.
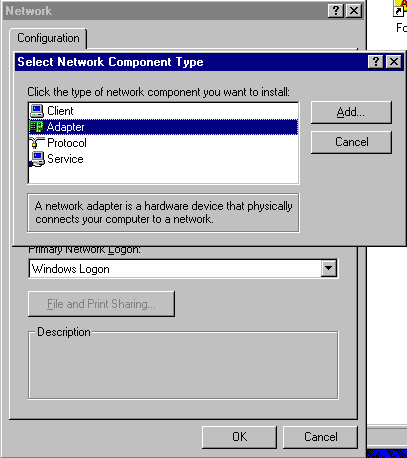
- Click the ‘Add…’ button, choose the Adapter option.
- Select the ‘Have Disk…’ button, navigate to the folder containing your INF and driver files.
- If you are using Windows 95 and would like to have internet access, then be sure to add the TCP/IP protocol at this time. This protocol should be included automatically if running Windows 98.
- Inside of the Network control panel click ‘Add…’, choose ‘Protocol’, look under Microsoft to find the TCP/IP protocol.
- Click ‘OK’. You may be prompted to specify a Workgroup name, located under the Identification tab. The driver should install and you will be prompted to restart your computer. Before rebooting, check your AUTOEXEC.BAT file and make sure that the line below (or similar) is saved to the file:
C:\WINDOWS\net start
- Restart your computer. If everything worked correctly, then your NIC should now be working inside of Windows.
- If it is not working, then I recommend checking Device Manager and seeing if any issues are being reported with the newly installed network adapter. Further troubleshooting is beyond the scope of this post.
- (Optional) Use DUMMYNIC.INF to remove the PCI Ethernet Controller from the ‘Other devices’ header in Device Manager. This is done purely for cosmetic purposes and has no effect on functionality.
Useful Links
- Dell Forum Post (archived link) – OEMSETUP.INF file that can be used with a BCM440x NIC
- MSFN Forum Post (archived link) – Post going over the steps needed to get a DOS driver working in a Windows 9x OS. The steps in this post are difficult to understand and contain some extraneous steps, but it was used as my starting point so documenting it.
- Hacked BCM440x Driver for Windows 95 (archived link) – Hacked version of the driver based on version 4.37, supposedly compatible with Windows 95. Did not work for me, may be worth trying if using a BCM440x NIC.
- Official BCM440x v4.28 Driver (archived link) – Last version of the official driver that supported Windows 98.